 by
by Crimping jewelry wire is a great way to add a professional touch to your work. It can also save you time and money by eliminating the need for soldering. In this guide, we will show you how to get started crimping jewelry wire like a pro!
How to crimp jewelry wire
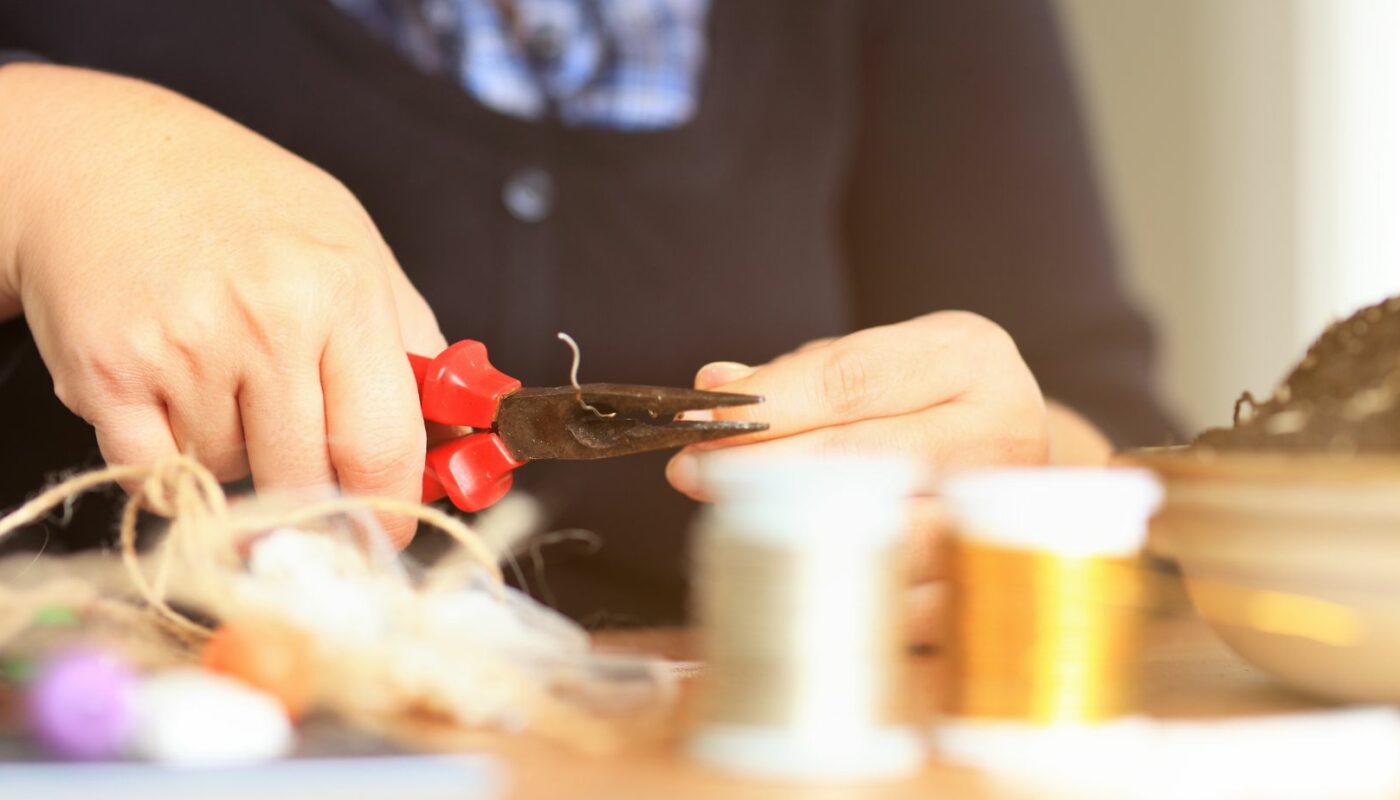
The first thing you need to do is gather your materials. You will need a pair of crimping pliers, jewelry wire, and clamps. You can find all of these materials at your local craft store or online. Next, you need to cut your wire to the desired length. Once you have cut your wire, use the clamps to secure it in place. This will prevent the wire from moving while you are crimping it.
Now, it’s time to start crimping! Place the jaws of your crimping pliers near the end of the wire and squeeze firmly. You should hear a clicking sound as the jaws close. release the pressure and move the jaws down the wire about 1/4 inch (6 mm). Repeat this process until you reach the end of the wire. Once you have reached the end of the wire, use the clamps to secure it in place again. This will prevent the wire from slipping out of place while you are working with it. Finally, use your fingers to smooth out any rough edges on the crimped area.
Common mistakes and how to fix them
Not flush
One of the most common mistakes people make when they first start crimping jewelry wire is not flushing the crimp. What this means is that the jaws of the crimping tool are not in full contact with the wire. This creates a weak point in your jewelry and ultimately can cause it to break.
What happens when the wire is not flush
If the wire is not flush, it can cause a lot of problems. The first and most obvious problem is that it can make it difficult to close the crimp. If the wire is not flush, it will protrude from the crimp and make it difficult to close. This can cause the crimp to come undone or even break. The second problem that can occur is that the wire can rub against the inside of thecrimping pliers and eventually wear away. This will eventually cause the wire to break.
The third problem is that if the wire is not flush, it can prevent the crimp from holding as tight as it should. This means that your jewelry piece may come undone over time. The fourth and final problem is that if the wire is not flush, it makes it more likely for the entirecrimping process to fail. When you are crimping jewelry wire, you need to make sure that each and every step is done correctly in order for it to be successful. If any step is done wrong, chances are that the entire process will fail.
How to fix it
If you’re not getting a good grip on the wire, try this: use the flat side of your needle nose pliers to hold the wire in place while you use your thumb to push the jaws of the crimping tool together. You can also use two pairs of pliers to hold the wire while you crimp.
Not centered
One of the most common mistakes people make when crimping jewelry wire is not having the wire centered in the crimp. This causes the crimp to be lopsided and can eventually lead to the wire breaking. Another mistake is not using the proper size crimp. Using a crimp that is too small can cause it to break, and using a crimp that is too large can cause it to slip off.
What happens when the wire is not centered
If the wire is not centered, it will not grip the sides of the crimp properly. This can cause the wire to slip out of the crimp, or even break completely.
How to fix it
One of the most common mistakes people make when crimping jewelry wire is not centering the crimp tube on the wire. This causes the tube to slide out of place when you go to squeeze it closed, and can ruin the whole piece. The best way to avoid this is to use a pair of flat-nosed pliers to gently squeeze the crimp tube in the middle, so that it collapses evenly on both sides.
Not at the correct angle
When you crimp, the jaws of the crimping pliers should be at a 45 degree angle from the wire. If they are not, your crimp will be weak and could easily pull open.
What happens when the wire is not at the correct angle
One of the most common mistakes people make when crimping jewelry wire is not holding the wire at the correct angle. The ideal angle for crimping is about 45 degrees, with the jaws of the crimping tool open about halfway. If the wire is held at too shallow an angle, the crimp might not close completely; if it’s held at too steep an angle, the jaws of the crimping tool can bite into the wire, weakening it.
How to fix it
There are a few ways you can fix this depending on how bad the mistake is. If the wire is only slightly off kilter, you can use your fingers to bend it back into place. Be careful not to damage the wire by bending it too much. If the wire is more severely bent, you can use needle nose pliers to grip the wire and gently pull it back into place. Again, be careful not to damage the wire. If the wire is completely kinked, you will need to cut off the damaged section and re-crimp a new piece of wire in its place.
Not secure
One of the most common mistakes people make when crimping jewelry wire is not securing the jewelry wire properly. This can cause the jewelry wire to come undone, which can be very frustrating. Another common mistake is not using the right size of crimp bead. Make sure to use a crimp bead that is the same size as the jewelry wire.
What happens when the wire is not secure
One of the most common mistakes people make when crimping jewelry wire is not making the wire secure. When you crimp the wire, you are essentially squishing it down so that it is smaller in diameter and can hold onto the beads much better. If you do not make the wire secure, then it can easily come undone and all of your beads will fall off. To make sure that your wire is secure, use two pairs of pliers to crimp it down- this will give you a much more secure hold and will prevent any accidents.
How to fix it
If you’re not happy with the way your jewelry wire looks after you crimp it, don’t despair! There are a few things you can do to fix it. First, make sure that you’re using the right size of crimp bead. If your wire is too thin for the bead, it will squish flat when you crimp it. If your wire is too thick for the bead, it will never fit all the way in and will look lumpy. Next, check to see if your crimp bead has teeth on the inside. These teeth are there to grip the wire and keep it from slipping out, but they can also prevent the wire from lieing flat against the bead. If your bead has teeth, try using a toothless Crimping Pliers instead.
Last, make sure that you’re flattening your crimp bead with pliers. Some people try to use their fingers to flatten crimp beads, but this usually doesn’t work very well. Get a good pair of Crimping Pliers and give them a try – they’ll make a big difference in the way your jewelry looks!
1.Cut your wire to the desired length using the wire cutters.
2.Use the needle nose pliers to make a small loop at one end of the wire.
3.String your beads onto the wire.
4.Use the needle nose pliers to make a small loop at the other end of the wire.
5.Use the flat nose pliers to gently squeeze the two loops closed.
It’s important to make sure that each section of the wire is tightly crimped, so that your jewelry will be secure. To do this, simply repeat steps 3 and 4 until you have reached the end of the wire.